Fall Gardening | Cool-Season Vegetables That Are Easy to Start from Seed

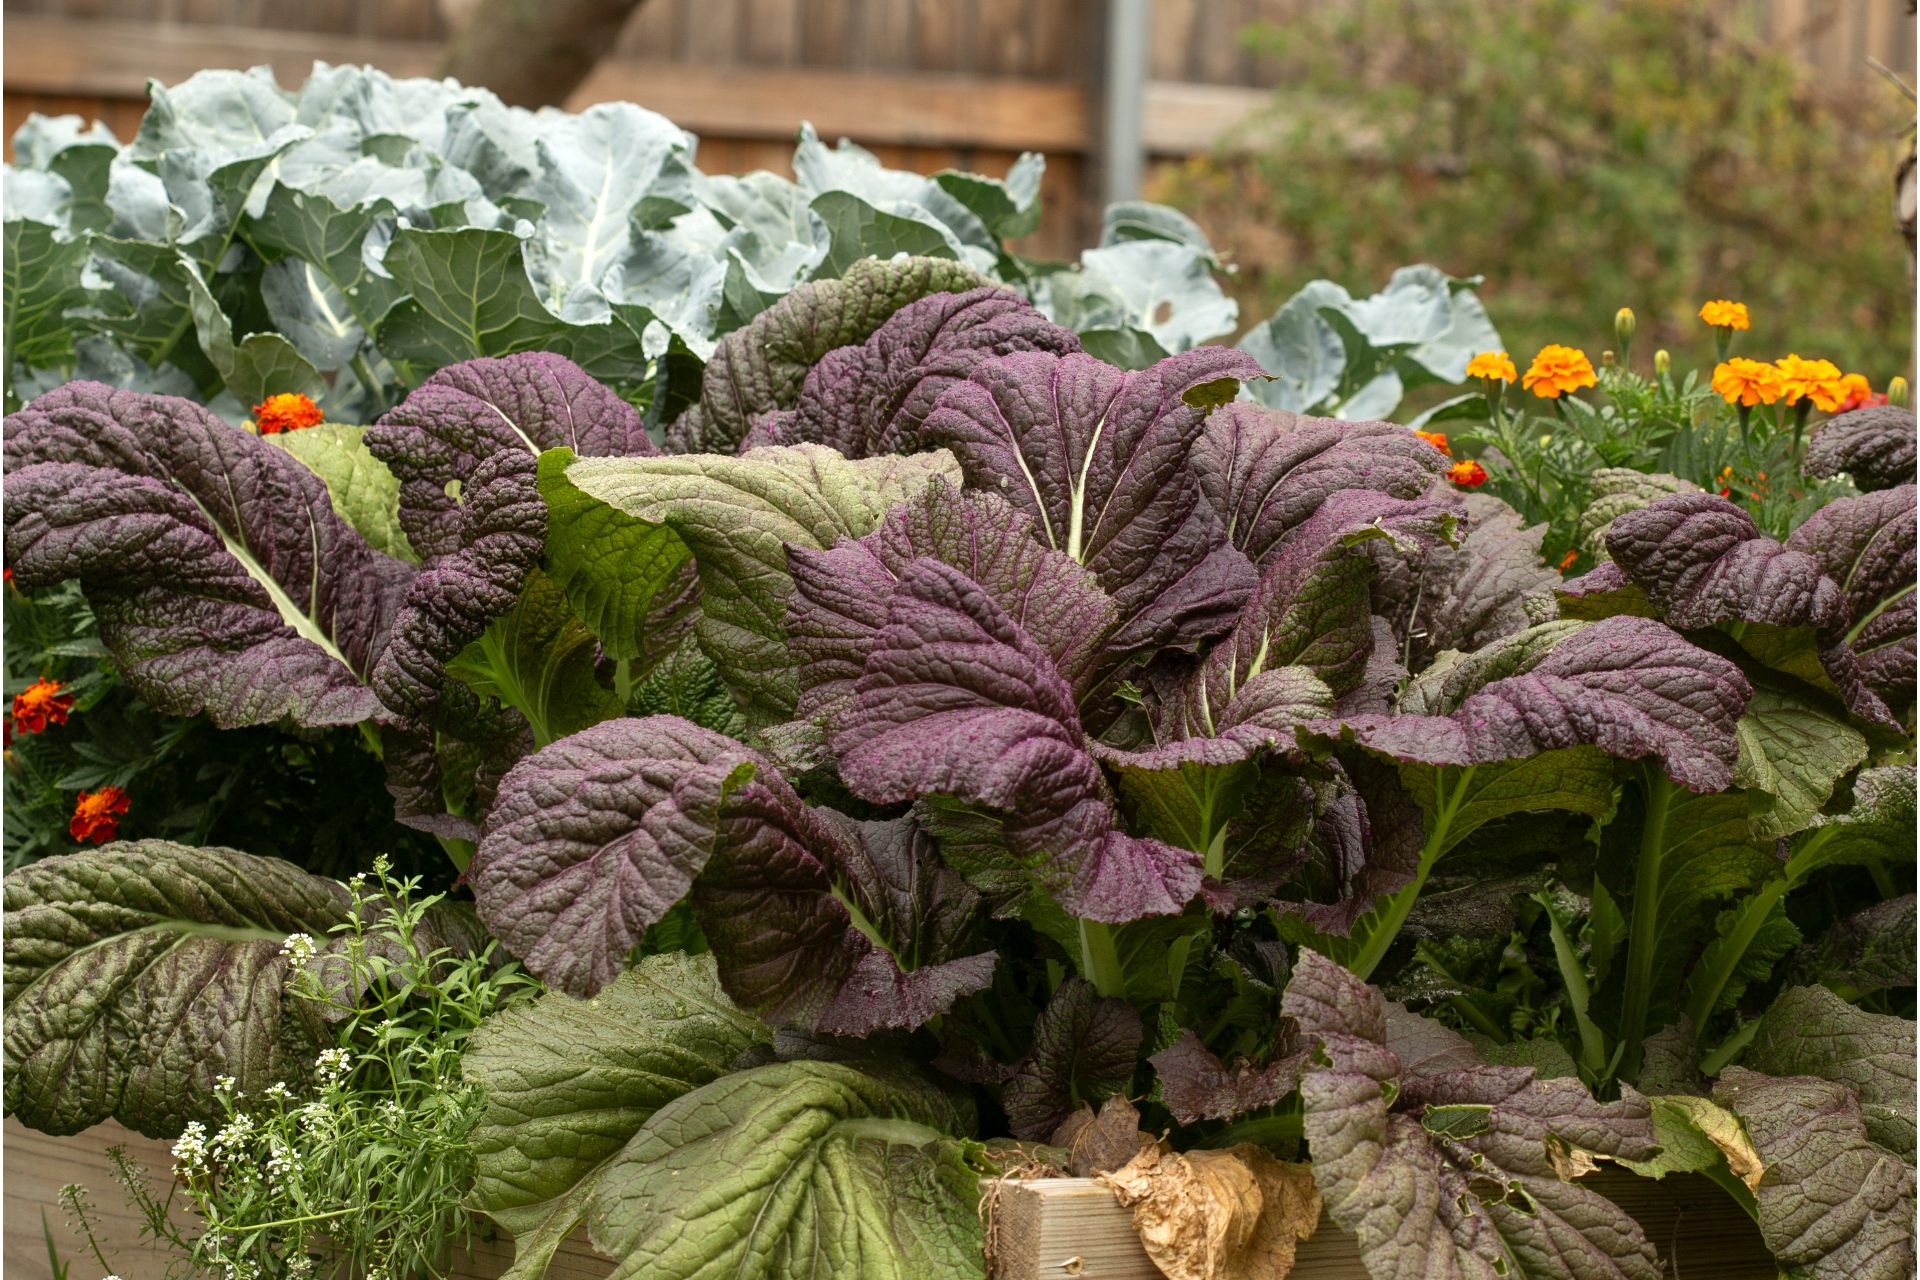
giant red mustard in the fall garden

Fall gardening is a delightful way to extend your harvest and enjoy fresh vegetables well into the cooler months. With the right selection of cool season crops, your garden can continue to thrive as the days shorten and temperatures drop.

Gardening in the fall offers numerous benefits, from fewer pests and diseases to the joy of harvesting hearty cool-season vegetables like kale and broccoli that don’t fair so well in summer. It’s like getting to start over again with some of the veggies you loved in spring but this time with the crisp autumn air and vibrant foliage as the backdrop of your garden.

After bidding farewell to warm-weather crops like tomatoes and cucumbers, you can look forward to harvesting vegetables that become sweeter with the cold. These are the leafy crops that continue to mature at a slower pace as the temperatures drop and the days grow shorter. This season’s produce not only withstands the chill but also benefits from it.

In addition to eating fresh produce in fall and winter, the plants you grow in a fall garden are among some of the most lovely and ornamental vegetables you can grow. Keep reading and you’ll see which ones are my favorites and why.

Fall Gardening with a Few Remaining Summer Challenges

Persistent Heat

Because fall gardening begins in late summer, it presents its own unique challenges, particularly in these beginning stages. 

Planting seedlings often coincides with several weeks of intense heat. In August, we are still getting triple digit temps and September isn’t much cooler. Last year we hit 100 degrees F the first week of September and were still having frequent days in the low 90’s toward the end of the month.

I have found it helpful to use a few simple strategies to help keep the soil and plants cool from August through September when seedlings are getting established. 

One way I do that is to add a thick layer of mulch like broken down leaves, wood chips, or straw with soaker hoses underneath. I soak the soil several times a week in the morning (if we haven’t had any rain) to keep it cool and moist for the seedlings and any seeds I’ve direct sown. The mulch keeps the sun, wind, and evaporation from drying out the soil while the water is cooling it underneath.

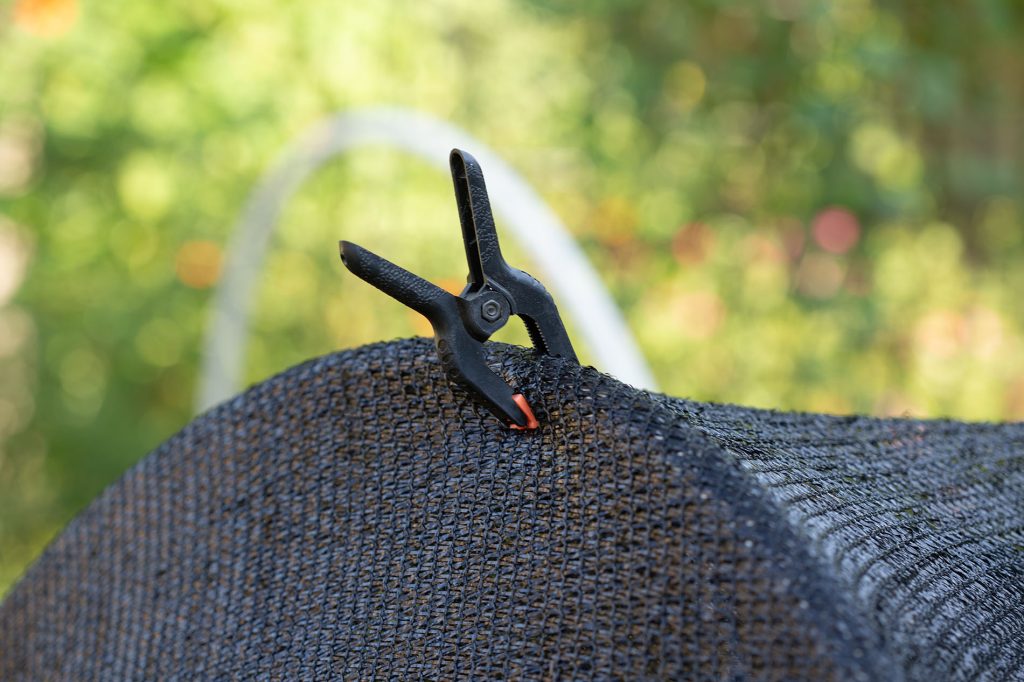
Second, I add shade cloth over the seedlings. I currently use a 50% shade cloth to shield those tender seedlings from the August sun that beats down on my garden all day long. This also acts as a barrier against certain pests.

shade cloth clipped to PVC pipe
I clip shade cloth to PVC pipes arched over each bed. I can pull and clip one side up to let more light in on cooler or overcast days.

Pests Are Still Lurking About

Ok I know I said that fall gardening brings fewer pest issues and that’s true, but that doesn’t mean it’s totally pest free. Lots of the insect pests that were plaguing the garden in summer have completed their lifecycle.

But then the fall garden becomes a defensive front against pests like cabbage loopers, cabbage butterfly caterpillars, and army worms. These pests can significantly threaten the young seedlings as they rush to mature before the first frost arrives. 

In early fall, I’m always looking out for the infamous small white butterflies bopping around the garden. These are cabbage butterflies, and they’re looking for a place to lay their eggs, which will become the worms that will dine on many plants in the fall garden.

the cabbage white butterfly
The caterpillar stage of the beautiful tiny cabbage white butterfly is a voracious eater of cabbage and other brassicas.

The shade cloth helps keep the butterflies and moths of these destructive caterpillars from landing on the crops. When the weather cools and I can remove the shade cloth, I replace it with light row cover as the pest barrier.

To apply either shade cloth and row cover, I use three bendable PVC pipes arched over my raised beds and clip the barrier material to the pipe with small clips.

Cabbage loopers
These are cabbage loopers, the larva of the cabbage moth. They wreak havoc on brassicas so be on the lookout and hand pick these off daily if you have them in the garden.

Vegetables I Start from Seed for the Fall Garden

I enjoy late summer in the garden. My tomato plants are winding down, which is good since I’ve begun to have my fill about now. Keeping up with the pepper harvest right now is a challenge so I’m cold smoking cayennes and dehydrating them for chili powder and making lots of bacon wrapped stuffed jalapeños.

I’m also gathering herb bundles and drying them to store for herbal blends and tea. This time of year, I’m also saving lots of seeds from the garden for next year and starting seeds indoors for the fall garden.

There are lots of cool season crops you can grow in fall that you can’t in summer and most are very easy to start from seed. I prefer starting them myself from seed because I can get started early and nurture them indoors. Plus, I can source seeds for varieties that aren’t available as plants in garden centers.

To know when to start and get the timing just right, I use The Old Farmer’s Almanac Planting Calendar. It provides dates to sow seeds and plant out for both spring and fall according to your zip code. 

Here are just a few cool season veggies I am growing this year for the fall garden.

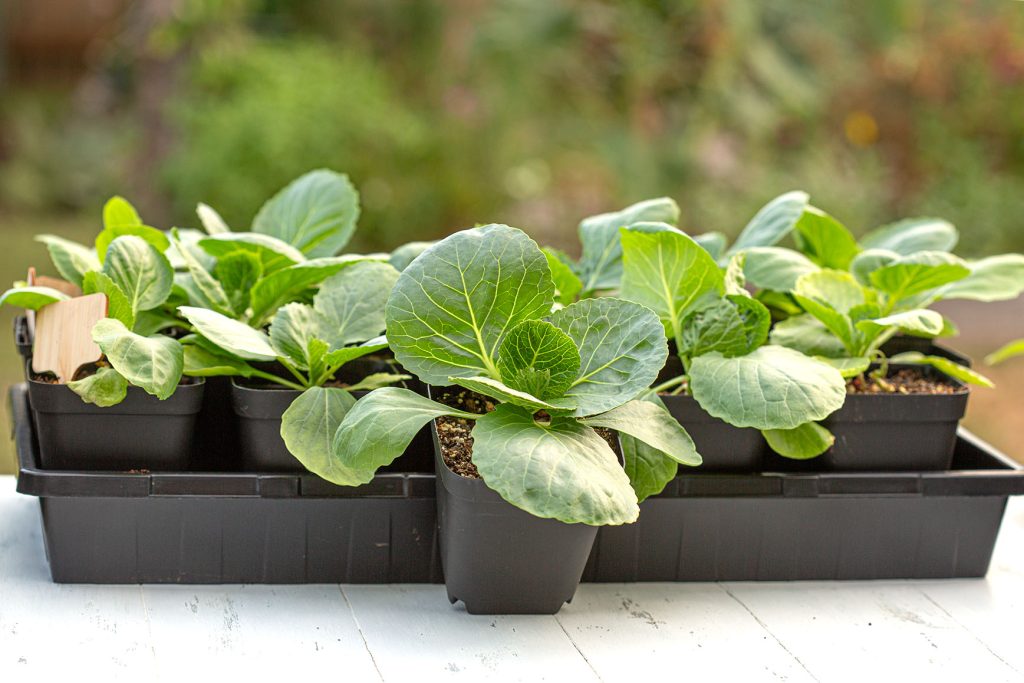
Potted cabbage seedlings
Cabbages grown from seed indoors and ready to go out into the fall garden.

Cabbage

Cabbage is easy to start from seed, thrives in cool weather, and doesn’t mind a light frost. I have had luck with a variety called Organic Golden Acre that I source from Annie’s Heirloom Seeds. You can direct sow cabbage 6-8 weeks before your first frost, but I like to start them indoors in mid-July. Transplants go out into the garden between August 17-24 or August 17-19 if planting by the moon. 

I use barriers to prevent the cabbage looper and cabbage worm, but the army worms still manage to get it in. They are the worst pest I battle when growing cabbage.  I have to go out each morning and pull back the leaves and folds to locate them.

Hand picking has been the best method for me as long as I stay on top of it.  I have also tried an organic pest control called B.t. that only kills caterpillars, but I didn’t find that it helped as much as hand picking. You’ll find a complete grow guide for cabbage here.

a head of cabbage in the garden
If you can conquer the caterpillars that love cabbage, you'll be greatly rewarded with with this in your fall garden.

Lettuce

Lettuce is such an easy fall gardening crop to grow. It’s fast maturing, cold tolerant, and comes in so many different beautiful varieties that it also adds ornamental appeal to the garden. 

I have grown so many types of lettuce over the years. Butter head types are a favorite in my house. To start lettuce from seed, I sow seeds on top of the soil indoors in flats in mid August. The seeds need light to germinate so don’t cover them up whether you are growing indoors or direct sowing in the garden. 

I plant seedlings out in mid September in full sun to partial shade. The key is not to plant while it’s going to be excessively hot for a long time. If you’ve ever grown lettuce in spring and let it stay in until summer, you’ve likely seen that it bolts and gets bitter. It’s truly a cool-season crop.

Many lettuce varieties are also what’s called cut-and-come-again. That means you can harvest leaves while leaving the plant in the garden and in just a few days, you’ll see new growth. Check out this guide on growing lettuce in both spring and fall. 

green leaf lettuce with purple tips
Lettuce is the ultimate cool season crop that keeps on giving all through fall and even into winter.

Giant Red Mustard

I have only just started growing giant red mustard in the past two years, but it’s one of my favorite fall garden plants. It has a spicy horseradish or wasabi-like flavor that adds an extra punch to salads. I harvest young leaves from the center for salads and leave the large outer maroon leaves as gardening eye candy. 

It’s an absolutely gorgeous plant. The way the autumn light hits those shimmery purple and green leaves is something really special in the fall garden. It’s so easy to start from seed with such reliable germination that I end up with way more plants than I can fit in my raised beds.

To use up all the extras, I add mustard seedlings into containers when I do my fall garden container refresh. It really adds color and texture to container gardens too.

The seed sowing info on the seed website suggests direct sowing to prevent transplant shock but I didn’t find that to be an issue. I sow mustard seeds in flats indoors in mid July to early August and transplant out in early September (the 2nd through the 14th if planting by the moon.)

Raised beds filled with fall crops
Giant red mustard adds color and contrast to the fall garden. I love those striking maroon leaves.

Broccoli

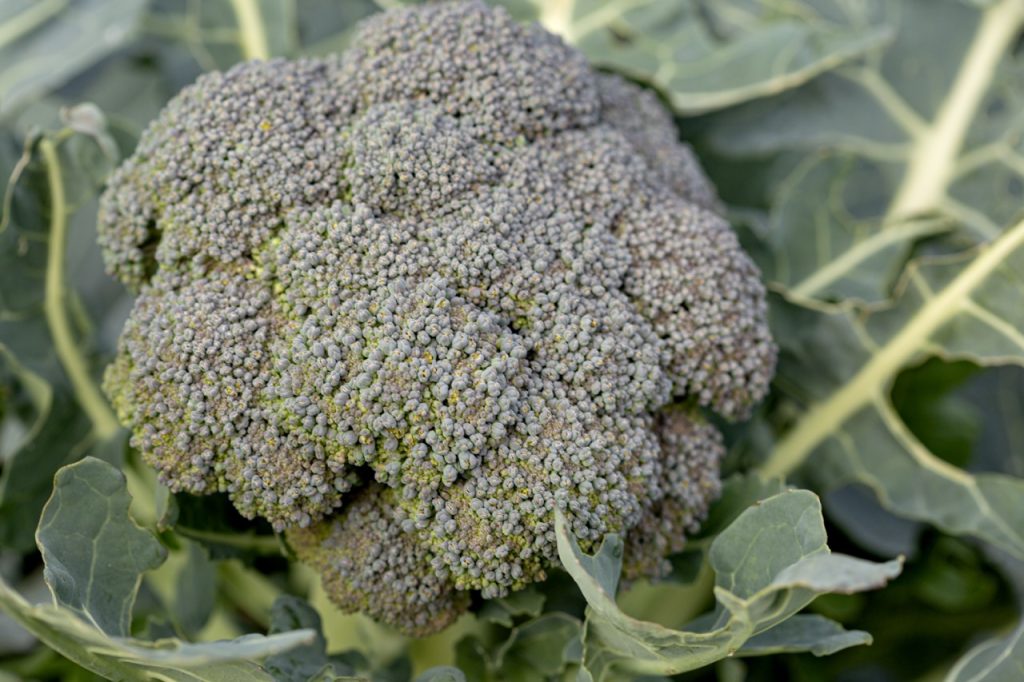
Growing broccoli can be intimidating. I think the first time I tried I did it all wrong. It was decimated by caterpillars and made tiny heads that never got big enough to eat. Last year I decided to try again armed with more knowledge and about 10 more years of gardening experience under my belt. 

As I wrote about in my 2023 Garden Look Back, broccoli taught me patience last fall. I started a variety called Belstar from High Mowing Seed. I had heard from my boss Joe that Belstar performed well in his garden.

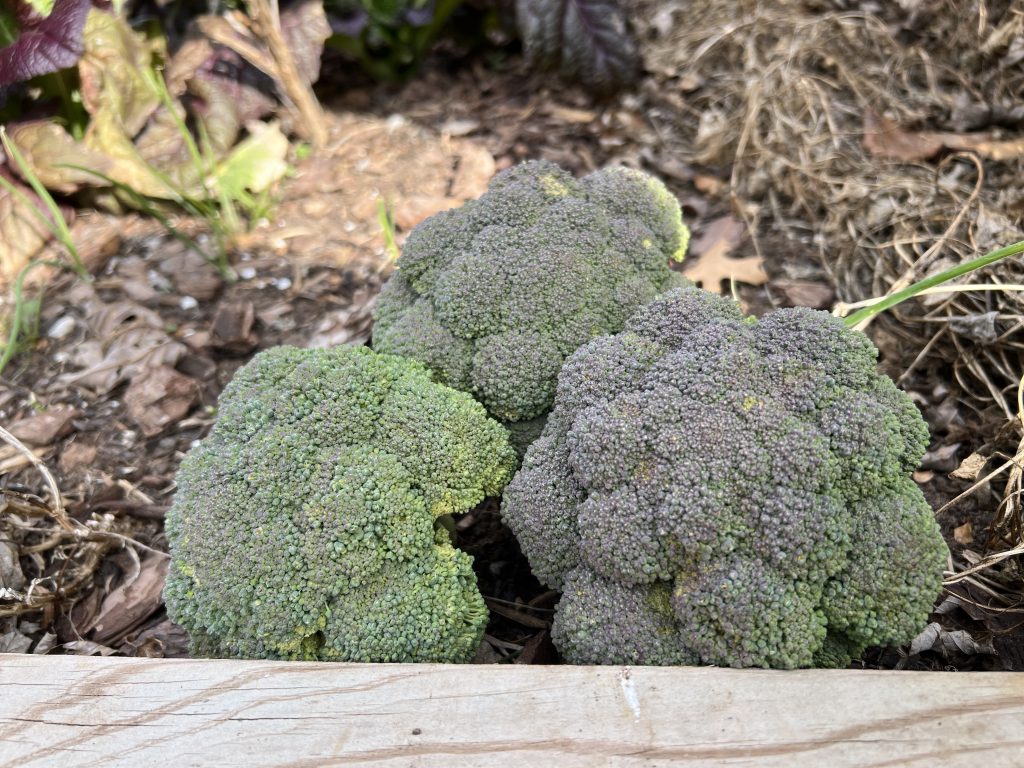
The seeds I started in mid July grew into the biggest and most gorgeous plants after transplanting them to the garden. Big beautiful plants was all they were for months. I thought, “well, here we go again.” But I kept those plants watered and covered and protected.  Then one day I saw the beginnings of the tiniest little broccoli and by November and up through January even, I was harvesting perfect, sweet homegrown broccoli.

broccoli head
Broccoli has always been an intimidating crop for me but I finally grew it successfully. I'm so glad I gave this another try. The flavor of homegrown is incomparable.

Kale

Kale is a hardy biennial that will overwinter in milder climates, and its flavor improves in cold weather. It’s in the Brassicaceae family like cabbage and broccoli so watch out for the same pests!

Last year I made the mistake of leaving my kale uncovered and every plant was completely defoliated by cabbage loopers and cabbage worms. I left the skeletonized plants in the ground and they did grow new leaves eventually but it really set them back. 

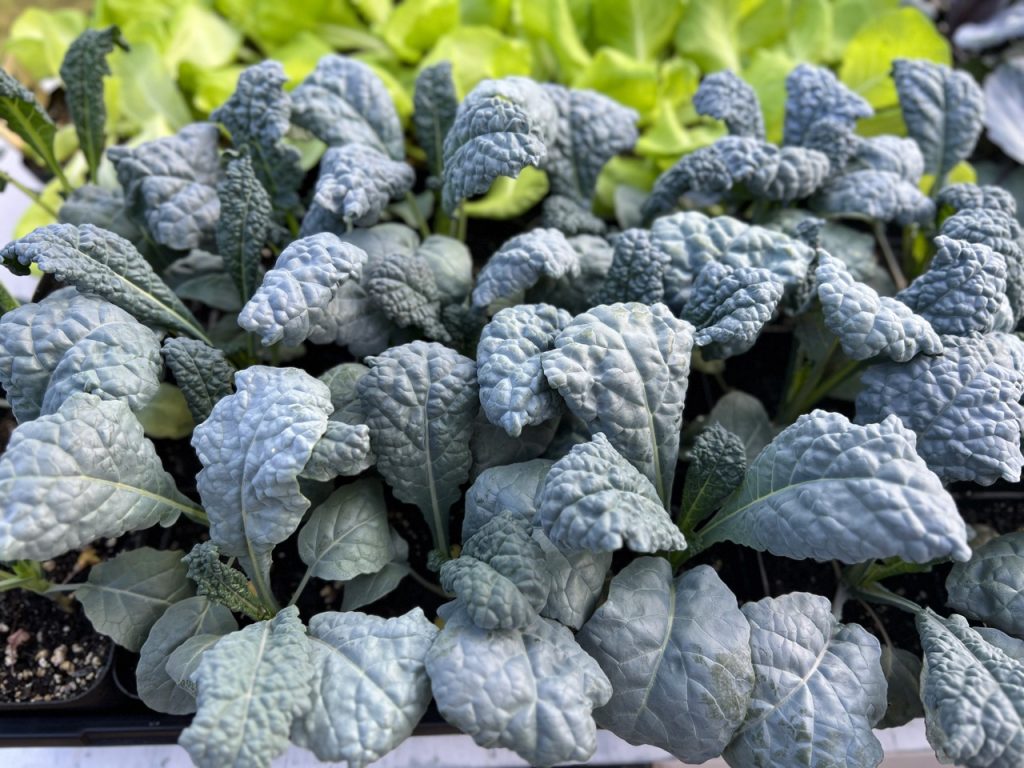
Around the end of July or first week of August you can start Kale indoors. By early September it should be ready to go out in the garden. In my experience, kale seed germinates quickly and prolifically. I especially like the variety pictured below called Black Magic from High Mowing Seed. It boasted a 100% germination in just a few days of sowing the seeds. Not only is this variety flavorful, but those curly, wrinkly leaves (savoyed) have the most striking blue green color.   

Kale seedlings
Look how gorgeous black magic kale is!

Beets

Beets are not only a cold hardy and earthy flavored root vegetable but they also offer edible greens that can be enjoyed in various dishes. Their rapid growth means you can harvest and savor them before many other crops. Additionally, beet greens are packed with nutrients, making them a valuable addition to your meals. 

Beets come in numerous varieties with bright colored stems and gorgeous leaves making them yet another fall crop that does double duty as both delicious food and eye pleasing ornamental.

For a fall harvest, I can sow beets directly from June to August, and they will remain hardy until temperatures drop to about 15 to 20 degrees F. Although seed companies advise against starting beets indoors due to their sensitivity to transplanting, I’ve experimented with this method using flats and achieved success. Despite beets being a root crop that typically dislikes being disturbed, my indoor-started plants have thrived, proving to be a viable alternative for early growth.

For a full guide to growing beets, check out this article on the joegardener® blog.

harvested beets in a basket
Beets are a versatile crop. You can eat the root and the leaves. And look how lovely the stems and foliage is.

Spinach

If you’ve ever enjoyed winter-harvested spinach, you know first-hand the rewards of fall and winter gardening. The main challenge is ensuring spinach seeds germinate and do so uniformly. Spinach seeds naturally germinate slowly and unevenly right out of the packet, especially since they prefer soil temperatures in the 60s, which can be difficult to maintain indoors.

Like other seeds, spinach goes through three germination stages: soaking up moisture, cell growth, and sprout emergence. Research, and my own experience, shows that “priming” seeds—soaking them for 24 hours, drying them for a day or two, and then storing them in an airtight container—improves germination rates. Primed seeds usually sprout within five days, compared to ten days for unprimed seeds, and they sprout more simultaneously.

Another effective method is direct sowing seeds in the garden in late fall or early winter, allowing nature to take its course. By spring, you’ll have a good healthy crop of spinach leaves.

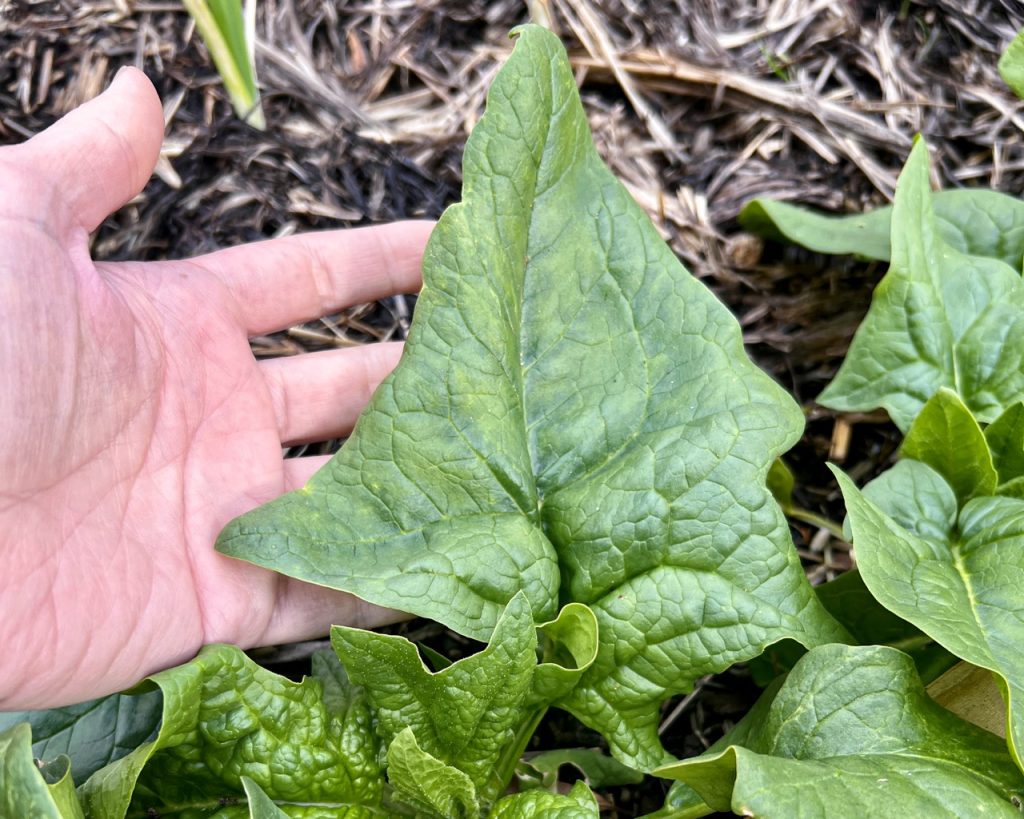
a large spinach leaf
Spinach can be tricky to germinate indoors so try some direct sown in late fall too. This patch of space hybrid spinach sprouted in early spring from seed I sprinkled in the soil in late fall and totally forgot about!

Onions

I love having fresh onions from the garden to cook with, and I grow both red and yellow varieties. For years I couldn’t figure out how to get onions to grow large bulbs. I was even choosing the right variety for my area (short or intermediate day onions) and planting seeds in early spring. They just never seemed to grow bigger than a golf ball.

Then I cracked the code.  I tried starting seeds in late summer and planting out in fall.  By April of the next year, I was trimming the green onion tops to make green onion powder. Then by June, we were harvesting and curing onions to store for the rest of the year. 

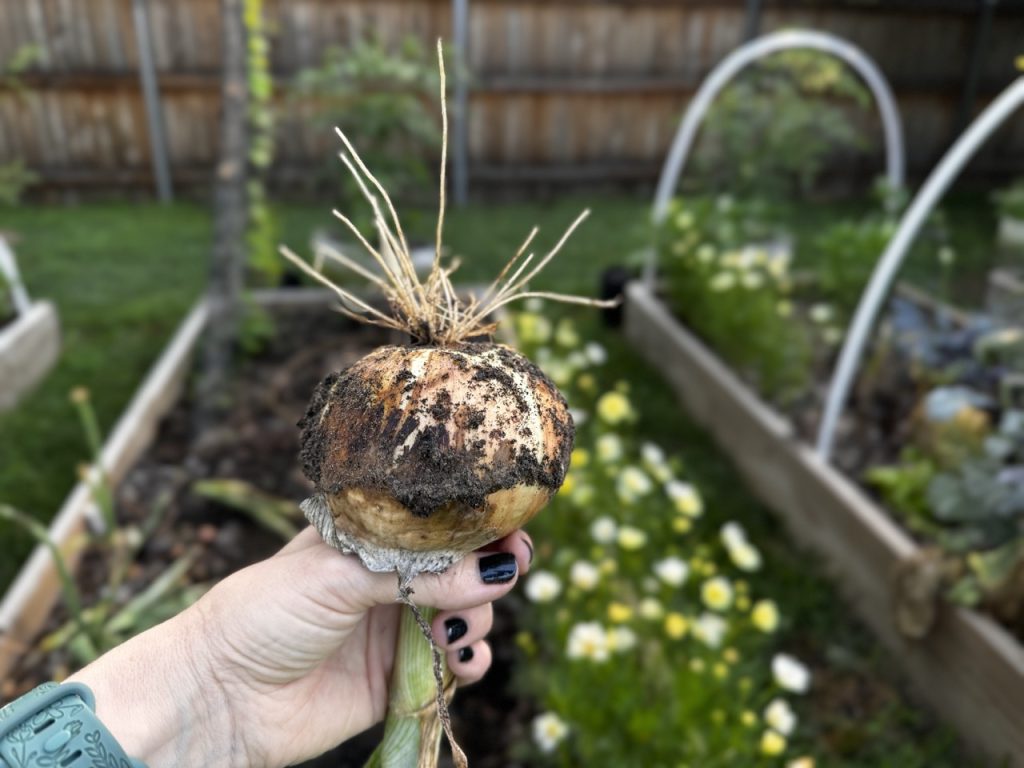
Holding an onion
Onions are a staple of fall gardening!

Onions develop most of their green top growth in cool weather and then focus their energy on bulb formation when it’s warm. So when I allowed them to get a head start on that in the fall, I was harvesting softball sized onions in June of the next year.

I started them in trays in late summer and trimmed them when they started to get tall and break over. Once they were about pencil sized I planted them out in the garden. This was about mid-October, which was perfect because it was also time to plant garlic. We planted all the alliums at one time on a cool October day.

I have had great luck with a yellow intermediate day variety called Candy that I get from Johnny’s Seed.  For everything you need to know to grow onions from seed to harvest, check out this article on the joegardener® blog.

Onion seedlings
Onion seedlings I started last fall. I am growing the same variety and using the same method again this year.

Garlic

I saved the best for last! If I had to choose a favorite fall gardening crop, garlic would be it. It’s the one that I have grown the longest and the one that I have had the most luck with.  In my zone, garlic is best started in the fall, left to overwinter under mulch, and then harvested in June. 

For the past few years, I have sourced the bulbs from Keene Garlic but have also had luck with Filaree Garlic Farm and Fruition Seed. Every October around the second or third week of the month, we plant at least one entire raised bed with garlic cloves. After planting, I rarely do anything else to care for garlic other than keep it mulched. I don’t fertilize or even water regularly unless we are in a severe drought. It’s very much a plant-it-and-forget it crop, but here’s a lot more how-to information about growing, harvesting, curing and storing. 

Garlic varieties are classified into softneck and hardneck based on their stalks, and I grow some of each. Softneck garlic has flexible stalks that can be braided and stored longer.

garlic scapes
Hardneck garlic makes scapes which are edible and delicious.

In contrast, hardneck garlic features woody, rigid stalks unsuitable for braiding but offers other unique advantages. Hardneck varieties produce scapes, which are edible flower stalks that can be harvested and used in cooking, adding a mild garlic flavor to dishes. The distinctions between these types extend beyond just their stalks, influencing their growth, flavor, and culinary uses.

There is no comparison to the flavor of homegrown garlic compared to store bought that has likely been shipped from a long distance. And the varieties and diversity of flavors and spiciness make this a must-grow in the garden. 
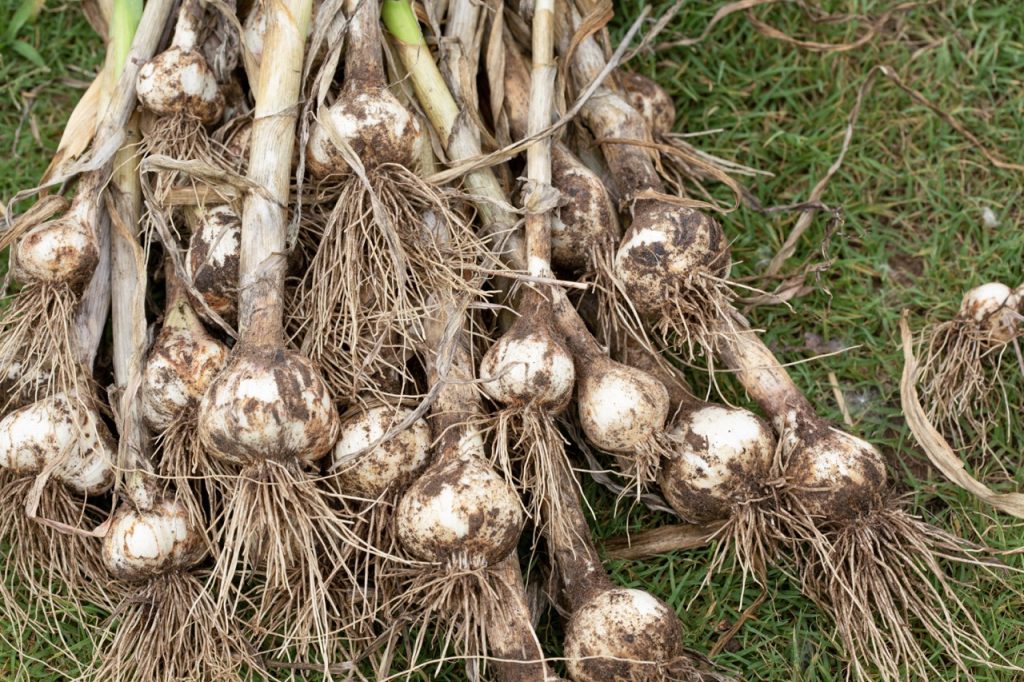
Harvested garlic bulbs
Garlic is planted in the fall but harvested the next spring or summer. It doesn't get much easier or more rewarding than growing garlic!

Preparing The Soil for Fall Gardening

By the time the soil in my raised beds have fed my spring and summer crops, it’s time to give it a little boost. Plants such as cabbage and broccoli and leafy greens are heavy feeders. And by summer’s end, my soil is depleted in the one nutrient they need more of – nitrogen.

Blood meal is a rich source of nitrogen, which is essential for leafy green growth and overall plant health. I use True Organic granular blood meal fertilizer with a 12-0-0 ratio. That 12 is the nitrogen content and that’s what my soil needs most of. Before I apply the blood meal, I first have to prep the soil a bit.

Opening Up the Soil Before Applying Amendments

The first thing I do is pull all of the mulch off the sop of my beds and load it into my garden cart.

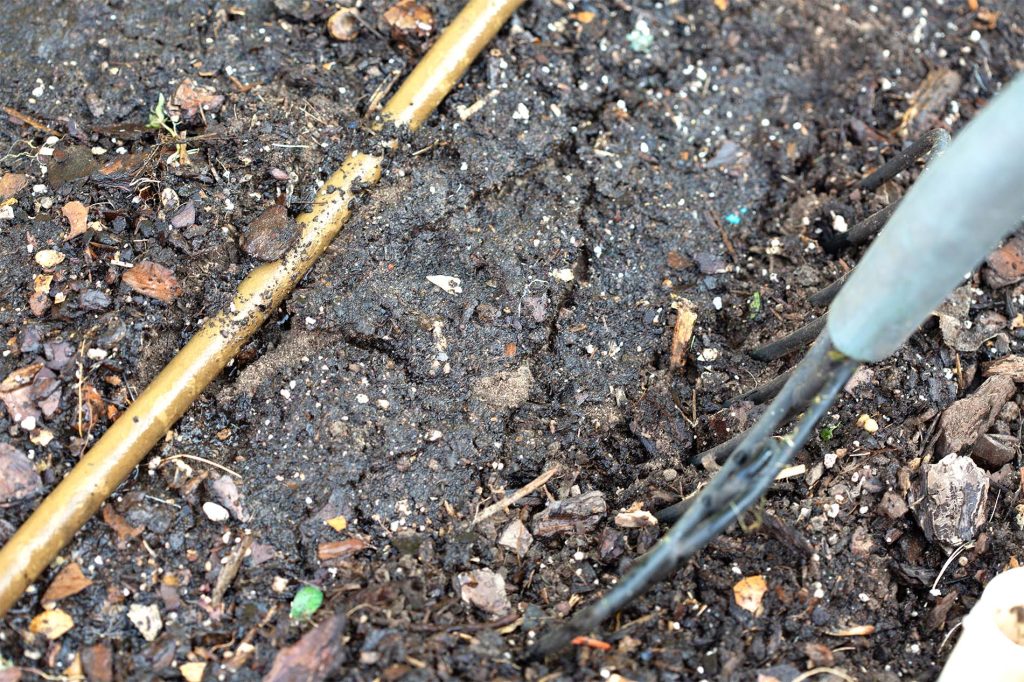
Next I grab my pitchfork and use it to loosen up and aerate the soil.  Rather than turning over or tilling, I apply this more gentle method, often referred to as broad forking (I don’t have a broad fork so I use a pitchfork instead). This prevents the disturbance or destruction of the mycelial networks and beneficial organisms that make up the soil food web.

I insert the pitch fork into the soil burying the tines, place one foot over the top of the tines and rock the handle back and forth. This action opens up holes and crevices in the soil that improves water infiltration and root penetration.  Unlike tilling, broad forking minimizes soil compaction and erosion, maintaining the natural soil layers. 

Pitchfork in soil
Before applying nitrogen fertilizer and compost, I use a pitchfork to gently loosen and open up the soil.

Adding the Fertilizer and Compost

After that step, I go ahead and distribute the blood meal granules across the soil following the directions on the package. Some of the granules will fall into those areas that were opened up and some will stay on the surface. As it breaks down, it will provide a steady release of nitrogen, supporting the vigorous growth these heavy feeders need throughout the fall season.

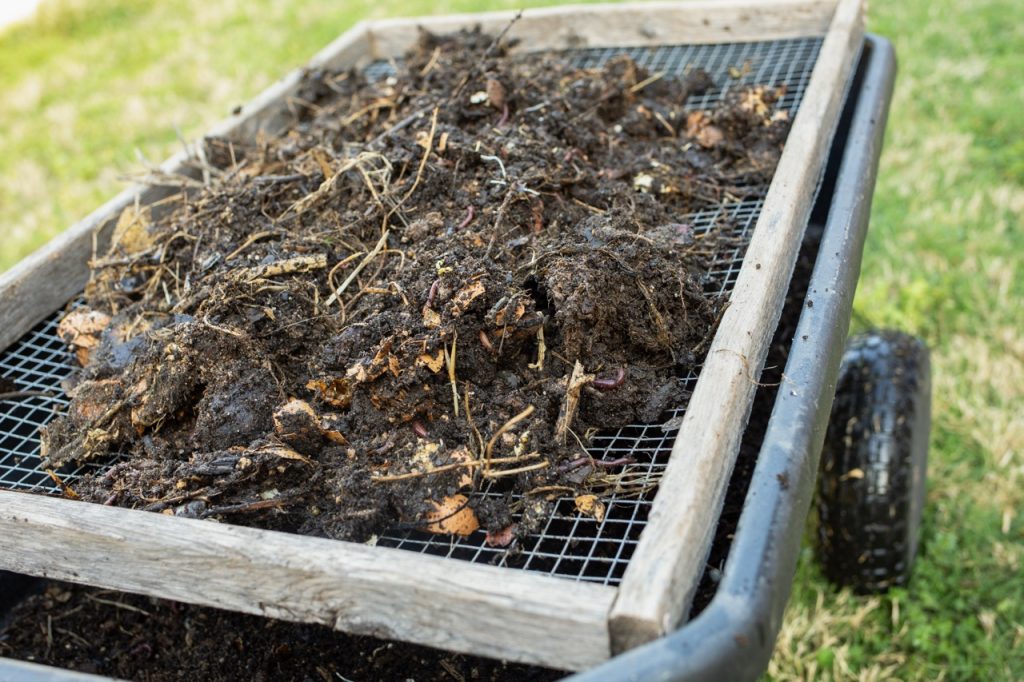
Then I load up my wheel barrow with homemade compost from my compost bin. I sift it first to remove material that hasn’t full broken down. I dump that sifted compost that always has tons of earthworms onto the raised bed and use a rake to spread all that compost evenly over the top of my soil. Some of the compost will also fall down into those aerated spaces. One full wheel barrow does the trick.  The compost adds more nitrogen plus other nutrients like phosphorous and potassium as well as additional organic matter.

compost sifting
I use this homemade compost sifter over a wheel barrow to separate the finished compost from the larger items that have not broken down.

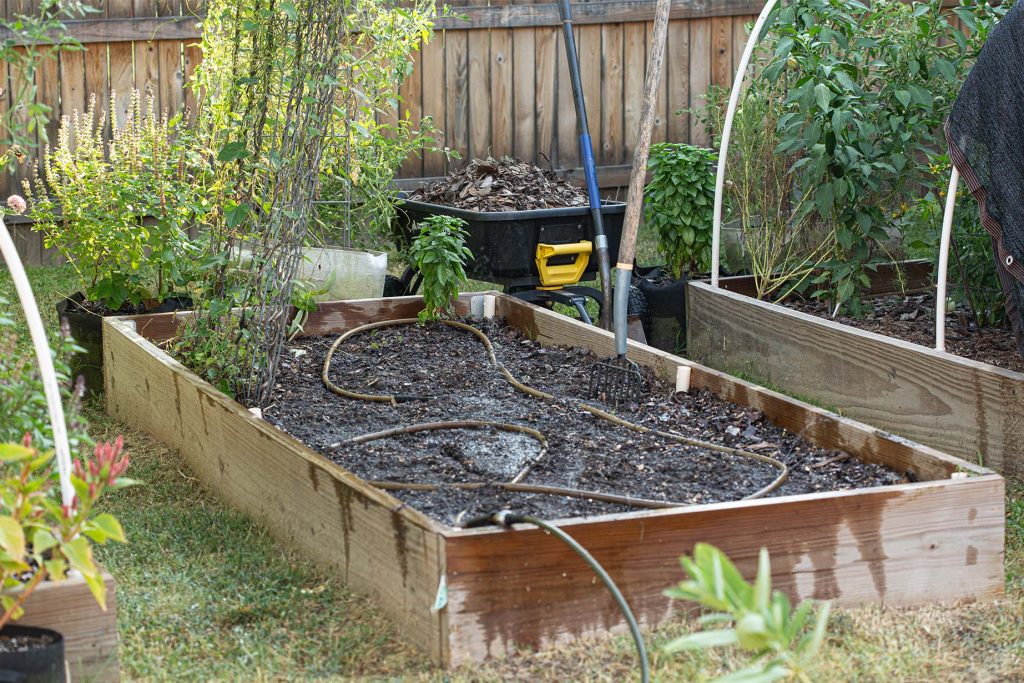
At this point I want to give the soil a good soak. It’s late summer so the soil is very hot and dry and the water will help cool the soil. This step also settles the compost and fertilizer into the soil and evenly distributes the nutrients. I lay down a soaker hose, hook up the water hose, and turn it on for a good hour or two to fully saturate the soil. You can also hand water.

The final step is to add a layer of mulch. I’ll use the mulch I just removed or add fresh mulch if needed like broken down leaves, wood chips, or straw. This layer of mulch will keep all that water you just applied from evaporating quickly. It will also keep the soil cool and suppress weeds. 

raised bed amended with compost to prepare for fall gardening
After loosening up the soil, adding blood meal, and spreading on a layer of compost, I add soaker hoses and saturate the soil before topping it off with mulch.

Give Fall Gardening a Try

Knowing what to plant in a fall vegetable garden extends your growing season and introduces you to a variety of hardy vegetables. By knowing your first frost date and starting plants from seed indoors, you can enjoy fresh produce well into the cooler months. I hope this guide has sparked some ideas for your fall garden. There’s still time to prepare and plant!

More On My Substack

2 Responses

Leave a Reply

Your email address will not be published. Required fields are marked *

Cultivating Nature's Wisdom

I’m a nature photographer and gardener sharing how I created an ecological garden in a small suburban backyard. I also share a few tips for growing and using herbs to craft your own homegrown spice blends.

Stay Connected

Related Articles

Stay Connected

We use cookies to give you a better website experience. By using this website, you agree to our use of cookies.